Halloween Cake Pops
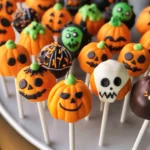
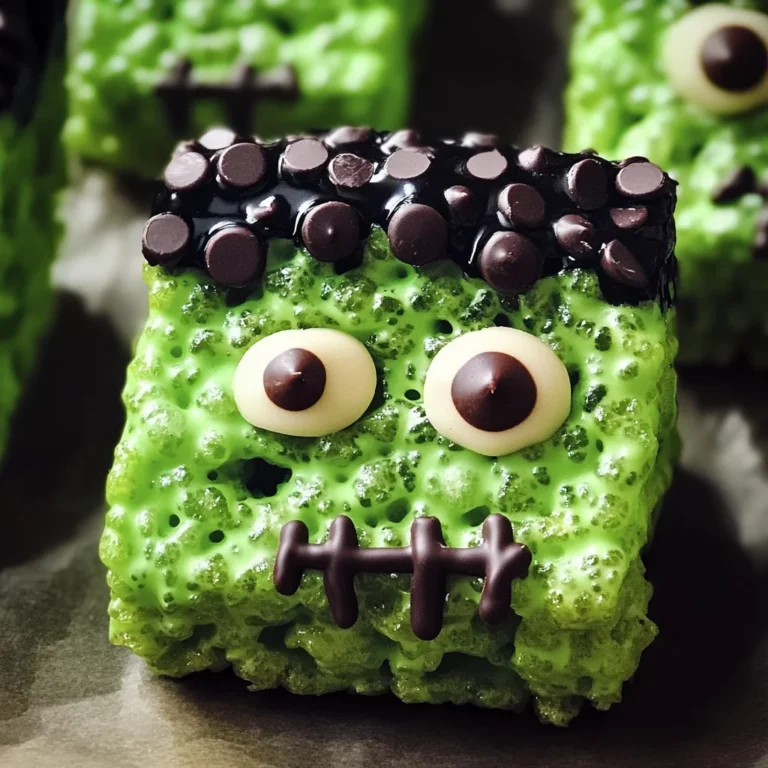
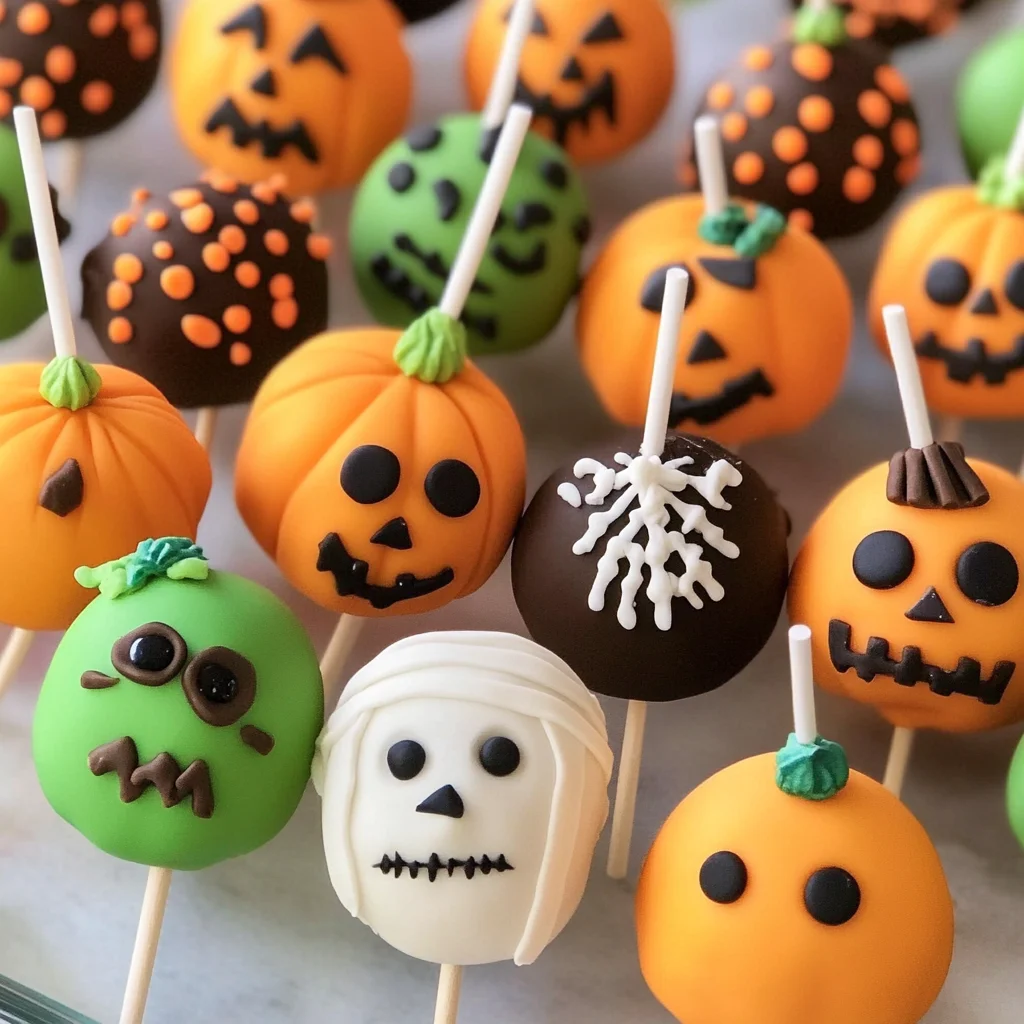
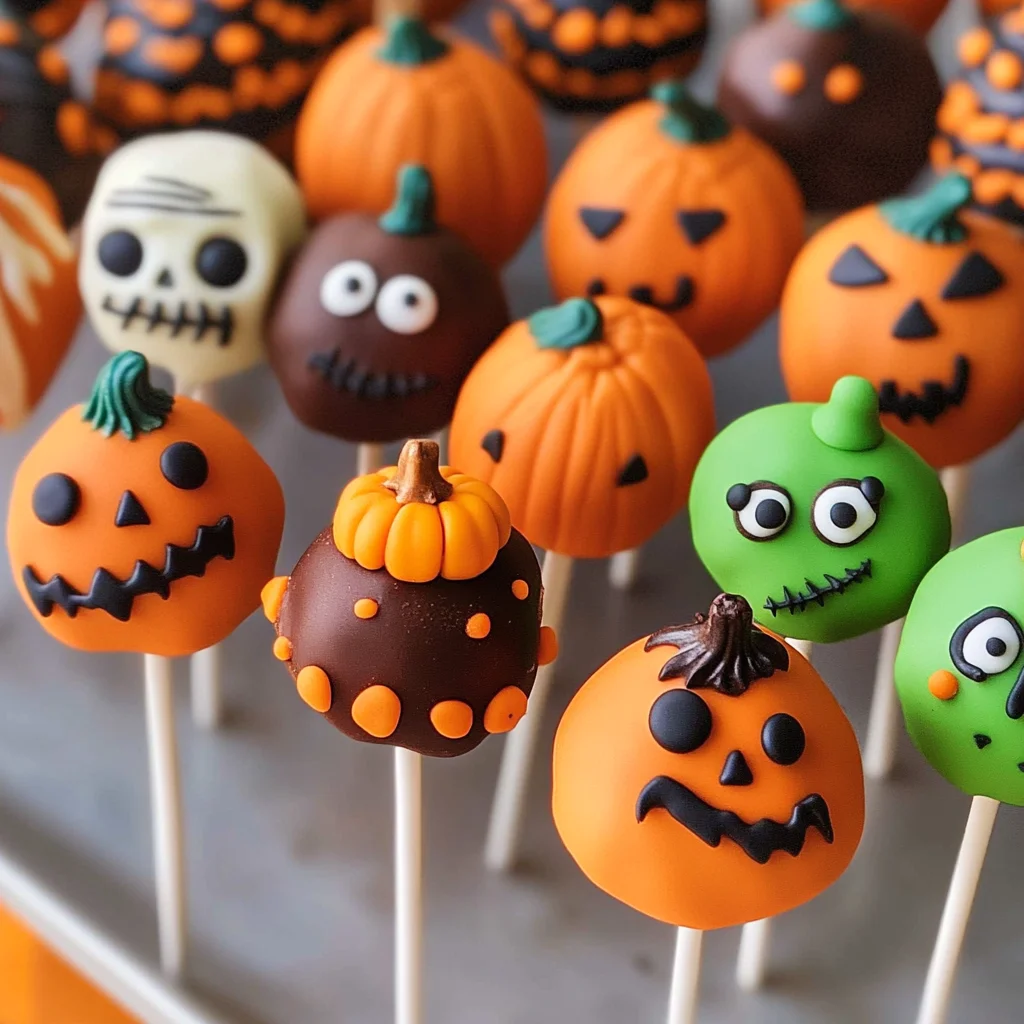
Add these spooky cake pops to your next Halloween party. Made with vanilla or chocolate cake, these bite-sized pieces of fun can be decorated as a Pumpkin, Frankenstein, or Mummy. Halloween Cake Pops are perfect for gatherings, bringing both taste and a festive spirit to your celebrations.
Why You’ll Love This Recipe
- Easy to Make: With simple steps and straightforward ingredients, these cake pops are a breeze for bakers of any skill level.
- Customizable Designs: You can decorate them in various spooky themes, making them perfect for Halloween parties.
- Great for Sharing: They are bite-sized and easy to transport, ideal for serving at gatherings or as party favors.
- Delicious Flavor: Using your favorite cake mix ensures that every bite is packed with flavor, appealing to both kids and adults.
- Fun Activity: Making these cake pops can be a fun activity for the whole family, allowing everyone to get creative with decorations.
Tools and Preparation
To make your Halloween Cake Pops successfully, you’ll need a few essential tools in the kitchen.
Essential Tools and Equipment
- Mixing bowl
- Electric mixer
- 13 x 9 inch cake pan
- Refrigerator
- Microwave or stove top for melting
Importance of Each Tool
- Mixing bowl: A large mixing bowl is crucial for combining your ingredients evenly without spills.
- Electric mixer: This tool saves time and effort when mixing the batter to achieve a smooth consistency.
- Refrigerator: Chilling the cake balls helps them maintain their shape before dipping into the melted candy.
- Microwave or stove top: These appliances allow for quick melting of Candy Melts, ensuring you can coat your cake pops easily.
Ingredients
Add these spooky cake pops to your next Halloween party. Made vanilla or chocolate cake, decorate these bite-sized pieces of cake for Halloween including a Pumpkin, Frankenstein, and a Mummy.
For the Cake Mixture
- 1 box Favorite cake mix
- 1 3.4 oz box instant pudding mix
- 4 eggs
- 1 cup water
- 1/3 cup vegetable oil
For Assembly
- 1 cup Frosting
- Candy Melts
- Toppings – sprinkles, candy eyes
How to Make Halloween Cake Pops
Step 1: Preheat the Oven
Preheat your oven to 350°F. Spray your 13 x 9 pan with vegetable pan spray.
Step 2: Prepare the Batter
In a large bowl, combine cake mix, pudding mix, eggs, water, and oil. Beat at medium speed for about 2 minutes until well combined. Pour into lightly greased cake pan.
Step 3: Bake the Cake
Bake for 30-40 minutes or until a toothpick inserted in the center comes out clean. Allow cooling in the pan for about 10 minutes before removing.
Step 4: Crumble the Cake
In a large bowl, use your hands to crumble the cooled cake until no large chunks remain. You can also use two forks to help break it apart.
Step 5: Mix in Frosting
Add frosting to the crumbled cake mixture. Mix with your fingers until the mixture is well combined and holds together.
Step 6: Form Cake Balls
Form small balls from the mixture using your hands. Aim for uniform size so they look great when served.
Step 7: Chill Cake Balls
Chill the formed balls in the refrigerator for at least 2 hours. This helps them harden and stay intact during decorating.
Step 8: Melt Candy Melts
Melt Candy Melts in short intervals (30 seconds) in the microwave at 50% power or on a stovetop until smooth.
Step 9: Insert Sticks
Dip sticks into melted Candy Melts before inserting them into each chilled cake ball. Let set; you can place them in the freezer for about 20 minutes to speed up this process.
Step 10: Dip in Candy Melts
Once set, dip each pop completely into melted Candy Melts. Wait until candy is firm before proceeding to decorate.
Step 11: Add Decorations
Sprinkle on your chosen decorations like chopped candies or sprinkles while the coating is still wet for best adhesion.
Now you’re ready to create delightful Halloween Cake Pops that are sure to impress!
How to Serve Halloween Cake Pops
Halloween cake pops are a fun and festive treat that can be enjoyed in various ways. Whether you’re hosting a party or simply celebrating the season, these cake pops can be the perfect addition to your dessert table.
As Party Favors
- Create individual bags: Package each cake pop in a small cellophane bag tied with a festive ribbon for a cute takeaway.
- Use themed containers: Serve cake pops in mini pumpkin baskets for an extra spooky touch.
On Dessert Tables
- Arrange on stands: Display your cake pops on tiered cake stands to create a visually appealing centerpiece.
- Mix with other treats: Pair them with Halloween-themed cookies and cupcakes for a delightful variety.
At Halloween Parties
- Include in potlucks: Bring your cake pops to share at gatherings, making them a hit among guests.
- Create a dessert bar: Set up a DIY decorating station where guests can add their own toppings.
How to Perfect Halloween Cake Pops
To make truly spectacular Halloween cake pops, consider these helpful tips.
- Choose quality ingredients: Using high-quality cake mix and frosting can enhance the flavor of your cake pops significantly.
- Crumble well: Ensure that your cake is crumbled finely; larger chunks may cause uneven shapes during the rolling process.
- Chill properly: Allow the formed balls to chill adequately in the refrigerator before dipping to prevent them from falling off the stick.
- Use steady hands: When dipping into melted Candy Melts, keep a steady hand for an even coating and avoid drips.
- Experiment with flavors: Don’t hesitate to try different flavored cakes or mix-ins for unique taste combinations.
- Store correctly: Keep leftover cake pops in an airtight container in the fridge for freshness.
Best Side Dishes for Halloween Cake Pops
Pairing side dishes with your Halloween cake pops can elevate your dessert experience. Here are some tasty options.
- Monster Fruit Cups – A mix of seasonal fruits arranged to resemble creepy creatures, perfect for balancing sweetness.
- Witch’s Brew Soup – A hearty green soup made from spinach or peas, served warm for added comfort on chilly nights.
- Spooky Veggie Platter – An assortment of colorful vegetables shaped like ghosts and goblins, served with a zesty dip.
- Ghoulish Cheese Board – A selection of cheeses and crackers presented artistically with edible decorations like olives and nuts.
- Goblin Guacamole – Creamy guacamole served in mini pumpkin bowls, paired with tortilla chips for crunch.
- Creepy Pasta Salad – A cold pasta salad featuring black olives and colorful veggies resembling creepy crawlers.
Common Mistakes to Avoid
When making Halloween Cake Pops, it’s crucial to avoid common pitfalls that can ruin your spooky treats. Here are some mistakes to watch out for:
-
Bold mixing: Not mixing the cake batter enough can lead to uneven texture. Ensure you beat the mixture for at least 2 minutes for a smooth consistency.
-
Bold crumbling: Crumbling the cake while it’s too warm can create a messy mixture. Allow the cake to cool completely before crumbling to achieve better binding.
-
Bold chilling: Skipping the chilling step can cause your cake pops to fall apart during dipping. Make sure to chill the formed balls for at least 2 hours.
-
Bold melting: Overheating Candy Melts can cause them to seize. Melt in short intervals and stir frequently for the best results.
-
Bold decorating: Leaving little time for decorations can make them slide off. Work quickly but carefully after dipping while the coating is still warm.
Storage & Reheating Instructions
Refrigerator Storage
- Store Halloween Cake Pops in an airtight container.
- They will last up to 1 week in the refrigerator.
- Keep pops separated with parchment paper to avoid sticking.
Freezing Halloween Cake Pops
- Wrap each pop individually in plastic wrap.
- Place wrapped pops in a freezer-safe container or bag.
- They can be frozen for up to 3 months; just remember to thaw them in the refrigerator before serving.
Reheating Halloween Cake Pops
- Oven: Preheat your oven to 300°F and place pops on a baking sheet for about 5 minutes until warmed through.
- Microwave: Heat on low power for about 10-15 seconds per pop, checking frequently.
- Stovetop: Warm gently in a covered pan over low heat, making sure not to melt them further.
Frequently Asked Questions
Here are some common questions about making Halloween Cake Pops:
What type of cake works best for Halloween Cake Pops?
Any flavor works well! Vanilla and chocolate are popular choices, but feel free to experiment with other flavors like red velvet or pumpkin spice.
Can I use homemade frosting?
Absolutely! Homemade frosting can add extra flavor and texture. Just ensure it’s thick enough to bind the cake crumbs effectively.
How do I make my Halloween Cake Pops look festive?
Use colorful Candy Melts and fun toppings like sprinkles, edible glitter, or candy eyes. Get creative with designs like mummies or pumpkins!
How long do Halloween Cake Pops last?
They last up to a week in the fridge and up to three months in the freezer if stored properly.
Can I customize my Halloween Cake Pops?
Yes! You can change the flavors, colors, and decorations based on your theme or personal preferences!
Final Thoughts
Halloween Cake Pops are not only delightful treats but also perfect for any festive occasion. Their versatility allows you to customize flavors and decorations according to your taste. Try making these spooky delights at your next gathering, and enjoy the smiles they bring!
Halloween Cake Pops
Bring a dash of fun to your Halloween festivities with these delightful Halloween Cake Pops! Perfectly bite-sized and easy to decorate, these treats can be transformed into spooky designs like pumpkins, mummies, or Frankenstein. Made with moist vanilla or chocolate cake, they are coated in vibrant Candy Melts and topped with playful sprinkles. Ideal for parties, gatherings, or as festive party favors, these cake pops promise to be a hit among both kids and adults. With simple steps and customizable designs, making these sweet treats is a fun activity for the whole family!
- Prep Time: 30 minutes
- Cook Time: 30-40 minutes
- Total Time: 0 hours
- Yield: Approximately 20 servings 1x
- Category: Dessert
- Method: Baking
- Cuisine: American
Ingredients
- 1 box favorite cake mix
- 1 3.4 oz box instant pudding mix
- 4 eggs
- 1 cup water
- 1/3 cup vegetable oil
- 1 cup frosting
- Candy Melts
- Toppings (sprinkles, candy eyes)
Instructions
- Preheat your oven to 350°F and spray a 13 x 9 inch cake pan with vegetable pan spray.
- In a mixing bowl, combine cake mix, pudding mix, eggs, water, and oil; beat at medium speed for about 2 minutes.
- Pour the batter into the prepared pan and bake for 30-40 minutes until a toothpick comes out clean.
- Once cooled, crumble the cake into fine pieces in a large bowl.
- Mix frosting into the crumbled cake until well combined.
- Form small balls from the mixture and chill in the refrigerator for at least 2 hours.
- Melt Candy Melts in short intervals until smooth.
- Dip sticks into melted Candy Melts before inserting them into each chilled cake ball; let set.
- Dip each pop into melted Candy Melts and decorate while still wet.
Nutrition
- Serving Size: 1 cake pop (45g)
- Calories: 180
- Sugar: 16g
- Sodium: 160mg
- Fat: 8g
- Saturated Fat: 2g
- Unsaturated Fat: 5g
- Trans Fat: 0g
- Carbohydrates: 25g
- Fiber: <1g
- Protein: 2g
- Cholesterol: 35mg

