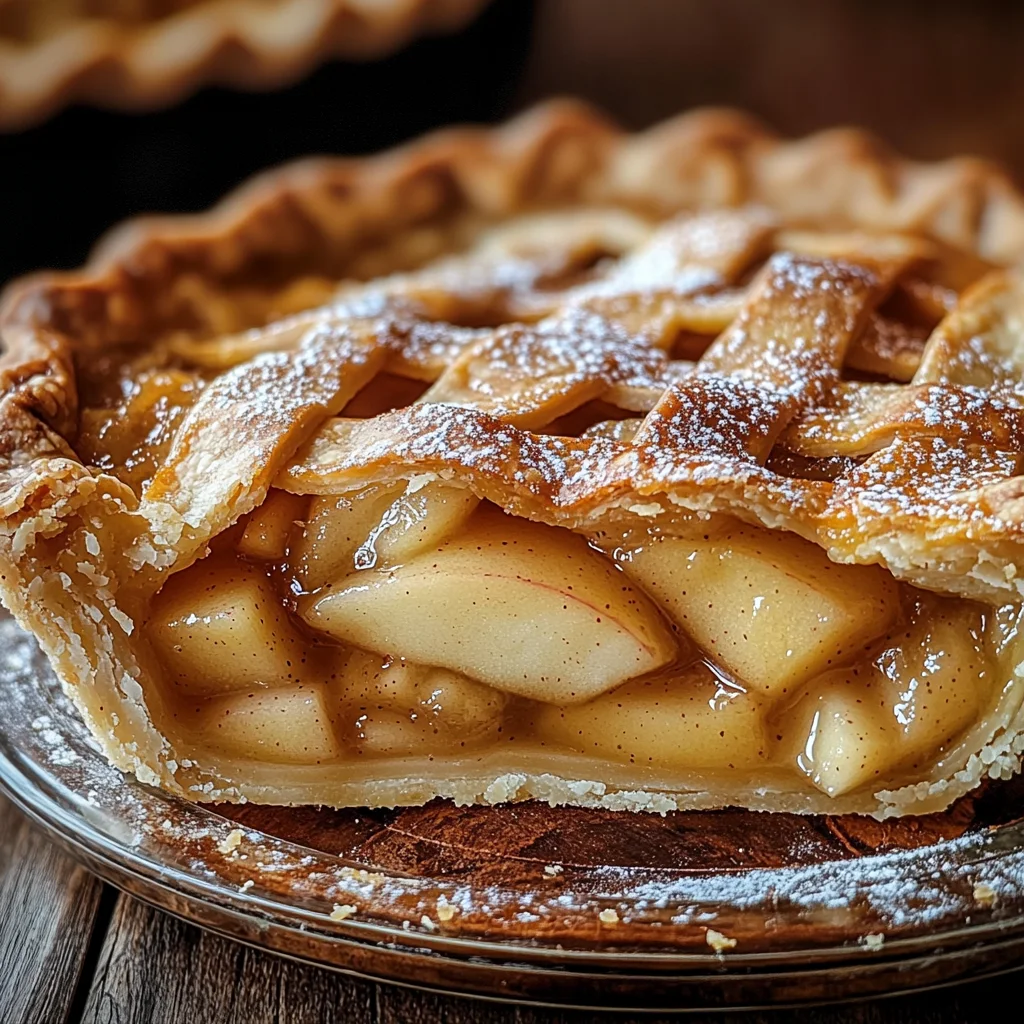
Classic Apple Pie
Experience the warmth and nostalgia of Classic Apple Pie with this delightful recipe. Perfect for family gatherings or a cozy night in, this pie combines sweet and tart apples with a flaky crust, creating a comforting dessert that brings everyone together. Its standout qualities lie in the perfect balance of spices and the buttery crust that envelops the luscious filling, making every bite a delicious journey through tradition.
Why You’ll Love This Recipe
- Easy to Make: With simple steps and readily available ingredients, you’ll find this recipe approachable and fun.
- Delicious Flavor: The blend of sweet and tart apples, along with warm spices, creates an irresistible taste.
- Versatile Occasion: Whether it’s a holiday feast or a casual family dinner, this pie fits perfectly into any setting.
- Inviting Aroma: Baking this pie fills your kitchen with a warm, inviting scent that welcomes everyone home.
- Customizable Ingredients: Feel free to mix different apple varieties or add your favorite spices to make it uniquely yours.
Tools and Preparation
Having the right tools makes the baking process smoother and more enjoyable. Below is a list of essential equipment you’ll need to create your Classic Apple Pie.
Essential Tools and Equipment
- Pie dish
- Rolling pin
- Mixing bowl
- Knife
- Peeler
Importance of Each Tool
- Pie dish: A good pie dish ensures even baking and helps achieve a nicely browned crust.
- Rolling pin: This tool is essential for rolling out the pie dough to the perfect thickness.
- Mixing bowl: A sturdy mixing bowl allows you to combine your ingredients without spills easily.
- Knife: A sharp knife makes peeling and slicing apples quick and easy.
Ingredients
For the Crust
- All-purpose flour
- Unsalted butter
- Salt
- Water
For the Filling
- Apples (Granny Smith or Honeycrisp)
- Granulated sugar
- Brown sugar
- Cinnamon
- Nutmeg
- Lemon juice
How to Make Classic Apple Pie
Step 1: Prepare the Crust
- In a mixing bowl, combine all-purpose flour, salt, and diced unsalted butter. Use your fingers or a pastry cutter to mix until crumbly.
- Gradually add water, mixing until the dough comes together. Divide into two disks, wrap in plastic wrap, and refrigerate for at least 30 minutes.
Step 2: Make the Filling
- Peel and slice the apples. Place them in a large bowl.
- Add granulated sugar, brown sugar, cinnamon, nutmeg, and lemon juice. Toss to coat evenly.
Step 3: Assemble the Pie
- Preheat your oven to 425°F (220°C).
- Roll out one disk of dough on a floured surface to fit your pie dish. Place it in the dish.
- Fill with the apple mixture, then roll out the second disk of dough for the top crust. Cut slits for steam vents.
- Cover the pie with the top crust, seal the edges, and brush with water or milk.
Step 4: Bake Your Pie
- Bake in a preheated oven for 15 minutes.
- Reduce the temperature to 350°F (175°C) and continue baking for about 35-45 minutes until golden brown.
Enjoy your freshly baked Classic Apple Pie warm, perhaps with a scoop of ice cream or a dollop of whipped cream!
How to Serve Classic Apple Pie
Serving classic apple pie is a delightful experience that enhances its comforting flavors. Whether for a family gathering or a cozy night, here are some serving suggestions to elevate your pie.
With Ice Cream
- Vanilla Ice Cream – The classic choice that pairs beautifully with warm apple pie.
- Cinnamon Ice Cream – Adds an extra layer of warmth and spice, complementing the pie’s filling.
With Whipped Cream
- Fresh Whipped Cream – Light and airy, it adds a creamy texture that balances the pie’s sweetness.
- Coconut Whipped Cream – A dairy-free alternative that brings a tropical twist to each slice.
With Caramel Sauce
- Drizzled Caramel – A rich addition that enhances the sweetness of the apples.
- Salted Caramel – The perfect contrast to the apple filling, providing a sweet and salty flavor combination.
With Nuts
- Chopped Pecans – Sprinkle on top for added crunch and nutty flavor.
- Almonds – Sliced almonds can add a delightful texture and subtle taste.
How to Perfect Classic Apple Pie
Creating the perfect classic apple pie requires attention to detail. Here are some tips to ensure your pie turns out wonderfully every time.
- Use Fresh Apples – Opt for a mix of tart and sweet apples for a balanced flavor profile.
- Chill Your Dough – Keeping your pie crust chilled helps achieve that flaky texture you desire.
- Spice it Right – Don’t skimp on cinnamon; it elevates the overall taste of the filling significantly.
- Avoid Overfilling – Too many apples can lead to a soggy bottom; stick to recommended amounts for best results.
- Bake with Steam – Adding steam helps prevent the crust from getting too hard while baking.
- Let It Cool – Allowing the pie to cool before slicing helps set the filling for easier serving.
Best Side Dishes for Classic Apple Pie
Pairing side dishes with classic apple pie can enhance your meal experience. Here are some great options to consider.
- Cheese Plate – A selection of sharp cheeses complements the sweetness of the pie beautifully.
- Salad with Vinaigrette – A light salad can provide a refreshing contrast to the richness of the pie.
- Roasted Vegetables – Seasonal roasted veggies add depth and balance, making for a well-rounded meal.
- Pumpkin Soup – The warmth and spices in pumpkin soup can play off the flavors in apple pie nicely.
- Bread Rolls – Soft rolls can be a comforting addition alongside your dessert course.
- Fruit Salad – A light fruit salad can cleanse the palate after indulging in rich apple pie.
Common Mistakes to Avoid
Making a Classic Apple Pie can be simple, but there are common pitfalls to watch for. Here are some mistakes to avoid:
- Overmixing the Dough: Overworking the dough can lead to a tough crust. Mix just until combined for a flaky texture.
- Not Prepping Apples Properly: Failing to slice or core apples correctly can affect the pie’s texture. Make sure to peel, core, and slice them evenly.
- Skipping the Spice: Neglecting spices like cinnamon can make your pie bland. Use a balanced mix for rich flavor.
- Ignoring the Cooling Time: Cutting into a pie too soon can result in a runny filling. Allow it to cool for at least an hour before serving.
- Using Too Much Sugar: Adding excessive sugar can overwhelm the natural apple flavor. Adjust sweetness based on apple variety.
Storage & Reheating Instructions
Refrigerator Storage
- Store your Classic Apple Pie in an airtight container.
- It lasts up to 3-4 days in the refrigerator.
Freezing Classic Apple Pie
- Wrap the pie tightly in plastic wrap and then aluminum foil.
- It can be frozen for up to 3 months.
Reheating Classic Apple Pie
- Oven: Preheat to 350°F (175°C). Bake for about 15-20 minutes until warmed through.
- Microwave: Heat individual slices on medium power for about 30-45 seconds.
- Stovetop: Place slices in a skillet over low heat, cover, and warm for approximately 5-10 minutes.
Frequently Asked Questions
What apples are best for Classic Apple Pie?
The best apples include Granny Smith, Honeycrisp, and Braeburn due to their balance of sweet and tart flavors.
How do I prevent my apple pie from being watery?
To avoid a watery filling, use firm apples and consider adding a tablespoon of flour or cornstarch as a thickener.
Can I make Classic Apple Pie ahead of time?
Yes, you can prepare the pie crust and filling separately in advance. Assemble and bake it closer to serving time.
What should I serve with Classic Apple Pie?
Serve warm with ice cream or whipped cream for a delightful contrast against the spiced apple filling.
How do I customize my Classic Apple Pie?
Feel free to add nuts, raisins, or different spices according to your taste preferences!
Final Thoughts
This Classic Apple Pie recipe brings warmth and nostalgia into any kitchen. It’s perfect for gatherings or cozy nights at home. You can also customize it by adding your favorite fruits or spices. Give it a try; you’ll love every delicious bite!
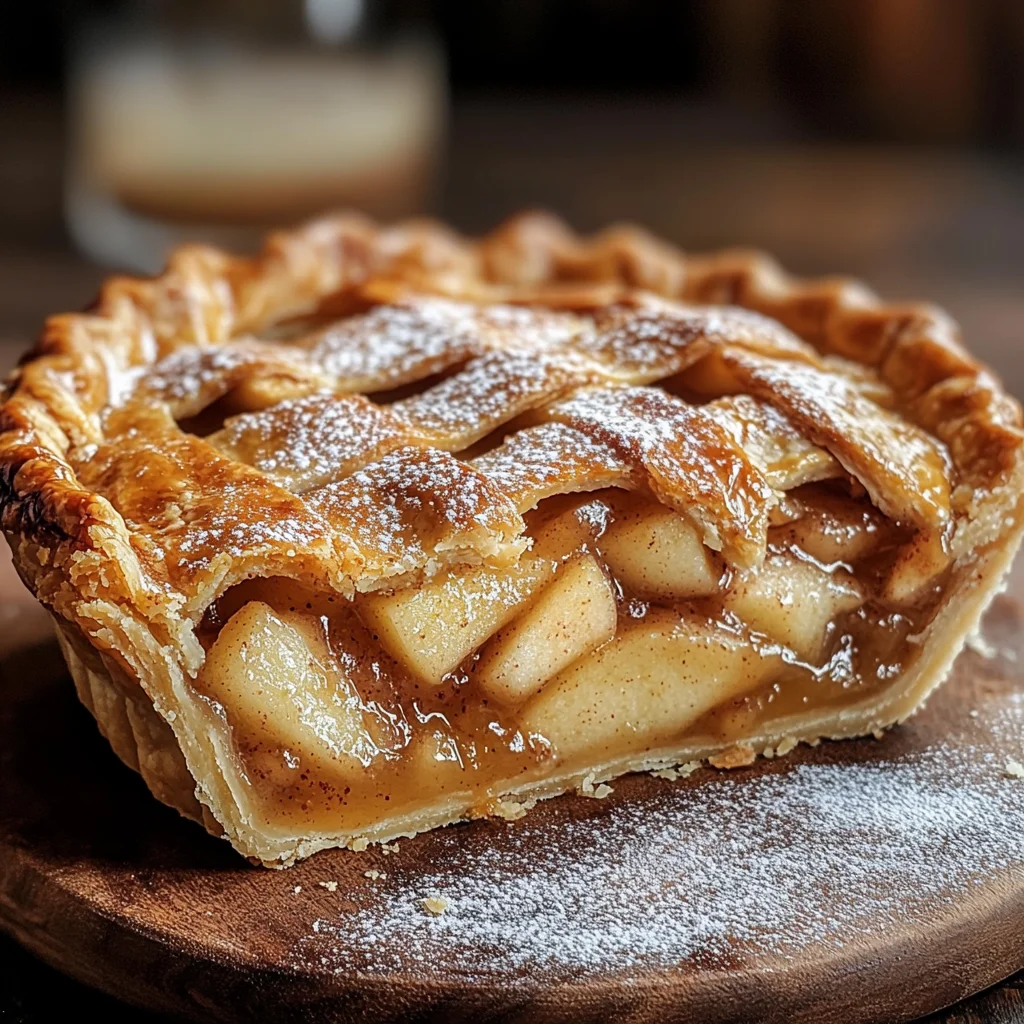
Classic Apple Pie

Indulge in the warm embrace of a Classic Apple Pie, a timeless dessert that captures the essence of comfort and nostalgia. This recipe features a delightful blend of sweet and tart apples enveloped in a flaky, buttery crust, creating a mouthwatering experience perfect for family gatherings or cozy evenings at home. With its inviting aroma filling your kitchen, every slice offers a delicious journey through tradition. The balance of spices adds depth to the apple filling, making this pie not just a treat but a cherished memory in every bite.
- Prep Time: 30 minutes
- Cook Time: 50 minutes
- Total Time: 1 hour 20 minutes
- Yield: Serves 8 slices
- Category: Dessert
- Method: Baking
- Cuisine: American
Ingredients
- All-purpose flour
- Unsalted butter
- Salt
- Water
- Apples (Granny Smith or Honeycrisp)
- Granulated sugar
- Brown sugar
- Cinnamon
- Nutmeg
- Lemon juice
Instructions
- Prepare the Crust: Mix flour, salt, and diced butter in a bowl until crumbly. Gradually add water until the dough forms. Divide into two disks, wrap, and chill for 30 minutes.
- Make the Filling: Peel and slice apples; combine them with sugars, cinnamon, nutmeg, and lemon juice in a large bowl.
- Assemble the Pie: Preheat oven to 425°F (220°C). Roll one dough disk into your pie dish, fill with apple mixture, roll out second disk for top crust with slits for steam vents. Seal edges and brush with water or milk.
- Bake: Start baking at 425°F for 15 minutes, then lower to 350°F (175°C) and bake for an additional 35-45 minutes until golden brown.
Nutrition
- Serving Size: 1 serving
- Calories: 250
- Sugar: 19g
- Sodium: 150mg
- Fat: 10g
- Saturated Fat: 6g
- Unsaturated Fat: 4g
- Trans Fat: 0g
- Carbohydrates: 38g
- Fiber: 2g
- Protein: 2g
- Cholesterol: 20mg