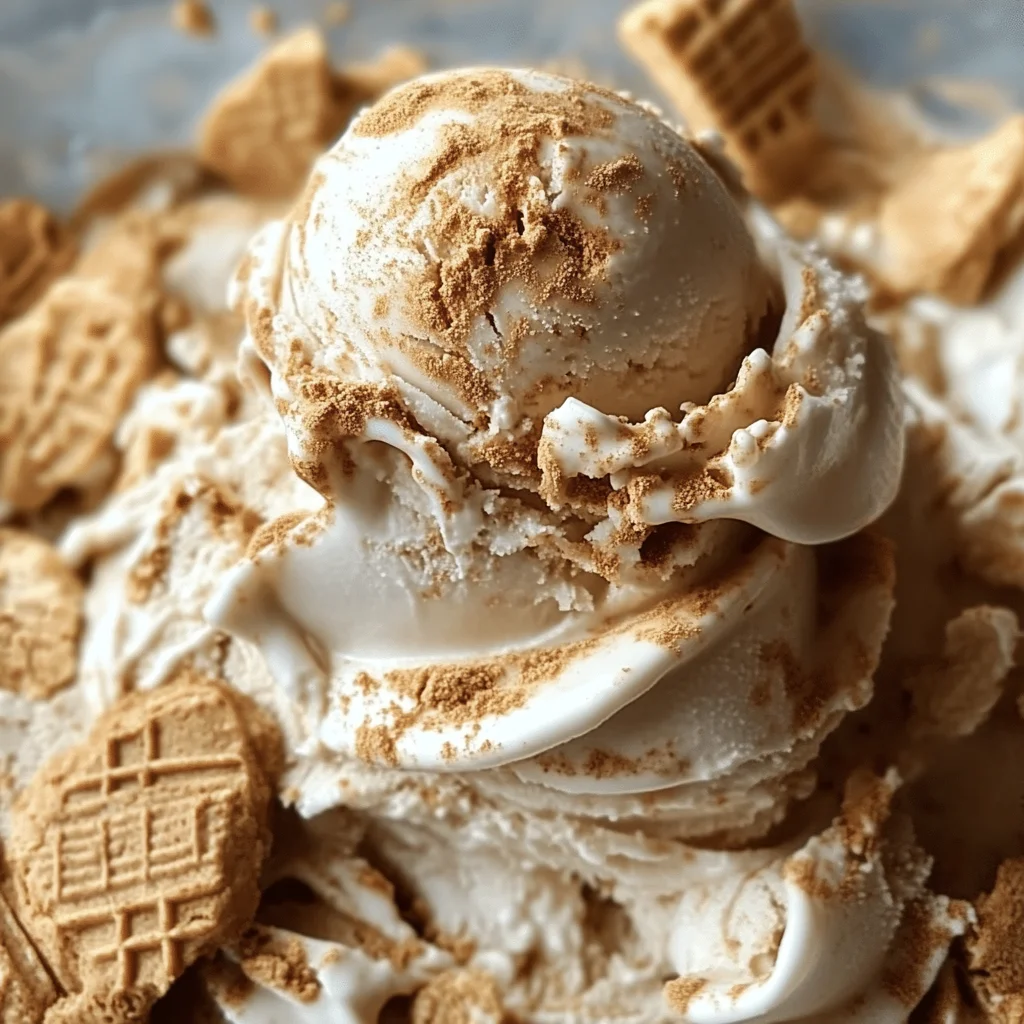
Creamy Homemade Biscoff Ice Cream
Creamy Homemade Biscoff Ice Cream is a delightful treat that brings the rich flavors of caramelized cookie butter to your freezer without the need for an ice cream maker. This no-churn recipe is perfect for summer gatherings, cozy nights in, or satisfying your sweet tooth anytime. With swirls of crunchy Biscoff cookies and ribbons of velvety cookie butter, it’s an indulgence that everyone will love.
Why You’ll Love This Recipe
- No Ice Cream Maker Required: Enjoy homemade ice cream without the hassle of special equipment.
- Quick Preparation: With just 15 minutes of prep time, you can whip up this decadent dessert in no time.
- Rich Flavor: The combination of Biscoff cookie butter and crushed cookies creates a uniquely delicious taste.
- Versatile Dessert: Perfect for parties, picnics, or simply a treat at home. It fits any occasion seamlessly.
- Crowd-Pleaser: Kids and adults alike will fall in love with this creamy delight.
Tools and Preparation
Preparing Creamy Homemade Biscoff Ice Cream is easy with the right tools. Gather your kitchen essentials to make the process smooth and enjoyable.
Essential Tools and Equipment
- Electric mixer
- Mixing bowls
- Measuring cups
- Rubber spatula
- Freezer-safe loaf pan or container
Importance of Each Tool
- Electric mixer: Ensures the heavy cream reaches stiff peaks quickly for a light texture.
- Mixing bowls: Provides ample space for combining ingredients without spilling.
- Rubber spatula: Helps gently fold ingredients together, maintaining the airy quality of the whipped cream.
Ingredients
For the Ice Cream Base
- 2 cups heavy whipping cream, chilled
- 1 can (14 oz) sweetened condensed milk
- ½ cup Biscoff cookie butter (plus extra for swirling)
- 1 teaspoon vanilla extract
For the Crunchy Swirl
- 8 Biscoff cookies, roughly crushed
How to Make Creamy Homemade Biscoff Ice Cream
Step 1: Prepare the Base
In a large mixing bowl, beat heavy cream with an electric mixer until stiff peaks form.
Step 2: Mix the Flavoring
In a separate bowl, whisk together sweetened condensed milk, ½ cup cookie butter, and vanilla extract until smooth.
Step 3: Combine
Gently fold the condensed milk mixture into the whipped cream until fully incorporated. Be careful not to deflate the mixture.
Step 4: Add Cookies and Swirls
Fold in the crushed Biscoff cookies. Drizzle extra cookie butter over the mixture and gently swirl with a knife for a marbled effect.
Step 5: Freeze
Transfer mixture to a freezer-safe loaf pan or container. Cover and freeze for at least 6 hours, or until firm.
Enjoy your creamy homemade Biscoff ice cream as a delightful dessert that will impress everyone!
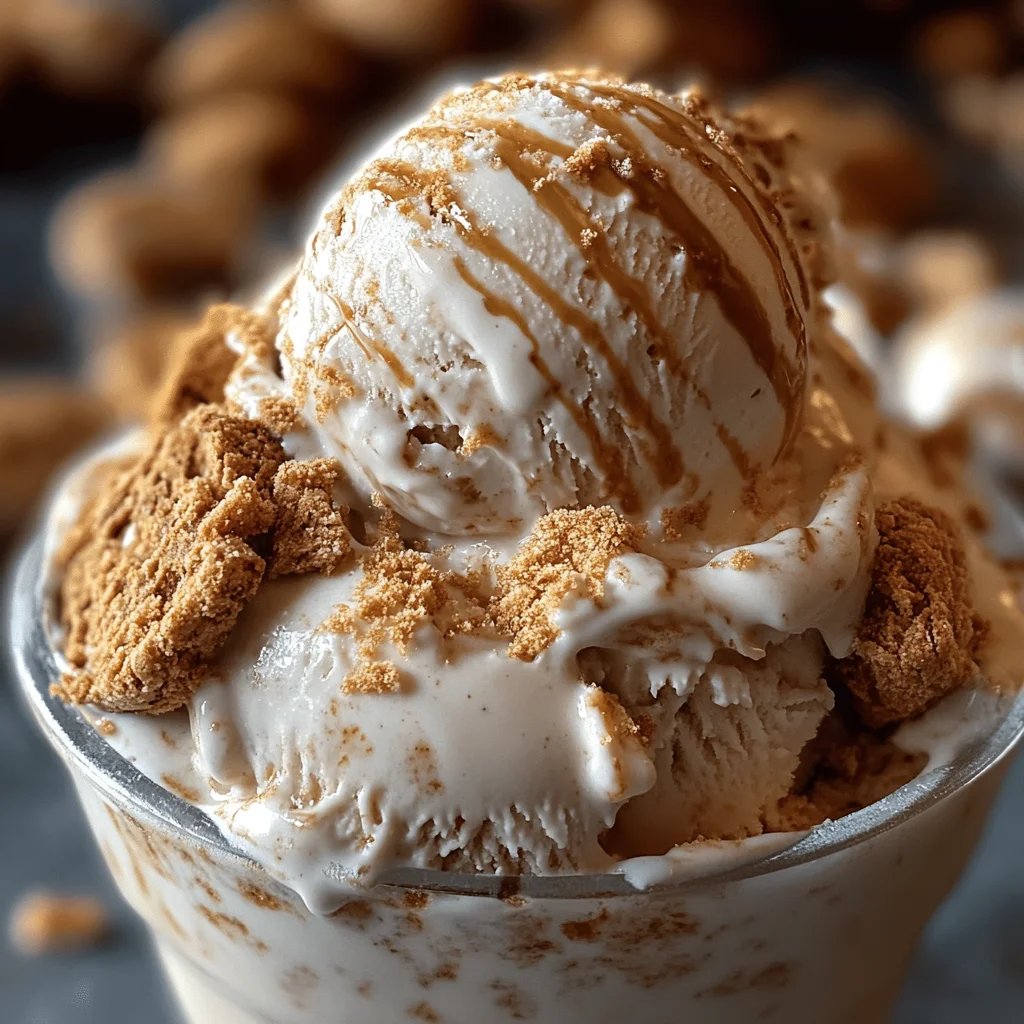
How to Serve Creamy Homemade Biscoff Ice Cream
Serving Creamy Homemade Biscoff Ice Cream can elevate your dessert experience. Whether you’re enjoying it on a hot day or celebrating a special occasion, here are some delightful ways to present this rich treat.
Classic Bowl
- Serve a generous scoop of ice cream in a chilled bowl for a simple yet satisfying dessert.
Sundae Style
- Top your Biscoff ice cream with whipped cream, chocolate sauce, and extra crushed Biscoff cookies for an indulgent sundae experience.
Ice Cream Sandwiches
- Use two Biscoff cookies to create a delicious ice cream sandwich. This adds an extra crunch and enhances the flavor.
Milkshakes
- Blend a scoop of the ice cream with milk until smooth for a creamy Biscoff milkshake—perfect for warm weather!
Toppings Bar
- Set up a toppings bar with options like nuts, caramel sauce, or fresh fruit. Let guests customize their own servings for added fun.
How to Perfect Creamy Homemade Biscoff Ice Cream
Creating the perfect Creamy Homemade Biscoff Ice Cream requires attention to detail. Here are some tips to ensure your ice cream turns out wonderfully every time.
- Chill Your Ingredients: Start with chilled heavy whipping cream for better volume when whipping.
- Avoid Overmixing: Gently fold the mixtures together to keep the airiness intact; overmixing can lead to a denser texture.
- Use Quality Cookie Butter: High-quality Biscoff cookie butter will enhance the flavor and texture of your ice cream.
- Customize Add-ins: Feel free to experiment with different cookie types or mix-ins like chocolate chips for variety.
- Allow Proper Freezing Time: Let your ice cream freeze for at least 6 hours to achieve that perfect scoopable consistency.
Best Side Dishes for Creamy Homemade Biscoff Ice Cream
Pairing side dishes with your Creamy Homemade Biscoff Ice Cream can enhance the overall dessert experience. Here are some delightful options to consider.
- Fresh Fruit Salad: A light and refreshing mix of seasonal fruits balances the richness of the ice cream.
- Brownie Bites: Rich chocolate brownie bites provide a decadent contrast to the creamy ice cream.
- Shortbread Cookies: Crisp shortbread cookies complement the flavors of the cookie butter beautifully.
- Chocolate Fondue: A small bowl of warm chocolate fondue invites dipping and adds an interactive element.
- Caramel Sauce Drizzle: A drizzle of homemade caramel sauce elevates each bite with added sweetness.
- Crispy Waffle Cones: Serve your ice cream in crispy waffle cones for an enjoyable textural contrast while eating.
Common Mistakes to Avoid
Making creamy homemade Biscoff ice cream can be a delightful experience, but there are a few common mistakes to watch out for. Here’s how to ensure your ice cream turns out perfectly.
- Incorrect Cream Whipping: Over-whipping the heavy cream can lead to a grainy texture. Stop whipping as soon as stiff peaks form to maintain the creaminess.
- Insufficient Mixing: Not folding the whipped cream and condensed milk mixture properly can result in uneven texture. Gently incorporate them until just combined to keep airiness.
- Skipping the Freezing Time: Attempting to serve the ice cream before it’s fully frozen will lead to a soupy mess. Make sure to freeze it for at least 6 hours or until firm for best results.
- Too Much Cookie Butter Swirl: Adding too much cookie butter can overwhelm the ice cream’s flavor. Use just enough to create beautiful swirls without overpowering the base.
- Wrong Storage Container: Using a non-freezer-safe container may affect texture and taste. Always opt for airtight, freezer-safe containers to preserve quality.
Storage & Reheating Instructions
Refrigerator Storage
- Store in an airtight container to prevent ice crystals from forming.
- Can be kept in the refrigerator for up to 2 days if you plan to consume it quickly.
Freezing Creamy Homemade Biscoff Ice Cream
- Ensure that your container is suitable for freezing; it should be airtight.
- The ice cream can be frozen for up to 2 months without losing flavor or texture.
Reheating Creamy Homemade Biscoff Ice Cream
- Oven: Preheat at 350°F (175°C) and warm the ice cream in an oven-safe dish for about 10 minutes, just until slightly softened.
- Microwave: Heat in short bursts of 10-15 seconds, stirring in between, until you reach your desired softness.
- Stovetop: Place in a saucepan over low heat, stirring continuously until softened.
Frequently Asked Questions
Here are some common questions about making creamy homemade Biscoff ice cream.
Can I make Creamy Homemade Biscoff Ice Cream without heavy cream?
Yes, you can use coconut cream or other dairy alternatives, though they may affect flavor and texture.
How long does Creamy Homemade Biscoff Ice Cream last?
When stored properly in the freezer, it lasts up to 2 months while retaining its flavor and quality.
Can I add other mix-ins?
Absolutely! Feel free to include chocolate chips, nuts, or different flavored cookie crumbles for added variety.
What if I don’t have Biscoff cookies?
You can substitute with any crunchy cookies that have a similar texture and flavor profile for delicious results.
Final Thoughts
Creamy homemade Biscoff ice cream is a fantastic treat that combines rich flavors with delightful textures. It’s easy to make and offers room for customization, whether you want extra cookie swirls or different mix-ins. Enjoy this indulgent dessert any time of year!
Creamy Homemade Biscoff Ice Cream
Indulge in the creamy, decadent delight of homemade Biscoff ice cream, a no-churn recipe that brings the rich flavors of cookie butter right to your kitchen. This easy-to-make dessert requires no special equipment, making it perfect for summer gatherings or cozy nights at home. With swirls of crunchy Biscoff cookies and ribbons of velvety cookie butter, this frozen treat is a crowd-pleaser for both kids and adults alike. Whip up this delightful dessert in just 15 minutes and let it freeze to perfection for a sweet escape any time you crave something indulgent.
- Prep Time: 15 minutes
- Cook Time: 6 hours
- Total Time: 6 hours 15 minutes
- Yield: 8 servings 1x
- Category: Dessert
- Method: No-churn
- Cuisine: American
Ingredients
- 2 cups heavy whipping cream
- 1 can (14 oz) sweetened condensed milk
- ½ cup Biscoff cookie butter (plus extra for swirling)
- 1 teaspoon vanilla extract
- 8 Biscoff cookies, roughly crushed
Instructions
- In a large mixing bowl, beat heavy cream with an electric mixer until stiff peaks form.
- In another bowl, whisk together sweetened condensed milk, ½ cup cookie butter, and vanilla extract until smooth.
- Gently fold the condensed milk mixture into the whipped cream until fully combined.
- Fold in crushed Biscoff cookies and drizzle extra cookie butter over the mixture; swirl gently with a knife.
- Transfer to a freezer-safe container and freeze for at least 6 hours, or until firm.
Nutrition
- Serving Size: ½ cup (120g)
- Calories: 295
- Sugar: 27g
- Sodium: 55mg
- Fat: 20g
- Saturated Fat: 12g
- Unsaturated Fat: 8g
- Trans Fat: 0g
- Carbohydrates: 25g
- Fiber: 0g
- Protein: 3g
- Cholesterol: 70mg